Discover the innovative potential of content creation with Canva–a free, online graphic design tool that’s ideal for users of all skill levels–including students! Canva provides an assortment of features that help simplify the content design process. The best part? Transferring newly created assets from Canva into Class Intercom to use for social media is easy. Here’s how:
Step 1: Bring ideas to life with premade templates, images, text options, and more.
Once logged into your Canva account, select Create New Design, then choose the applicable option. If you’re creating a design for Instagram, select Instagram Post (Square Image). Now you’re ready to start creating the graphic. In the left side panel navigation, you can navigate to templates, images, and text options. You can also upload images from your computer to use in your post from this panel.
Did You Know
Schools can get Canva Pro for free? Learn more here.
Canva is a useful tool for students, teachers, and PR professionals alike, making it easy to create professional designs without extensive technical software and training.
Step 2: Download the finished graphic to your device.
After you’ve finished your design, save it to your device. Select Share in the top right corner of the Canva dashboard and save the design as a PNG or JPG download. Be sure to save your graphic with a name that makes it easy to find among other saved images and files.
Step 3: Upload the graphic into Class Intercom.
Once logged into Class Intercom, you can either upload the graphic and compose a post for immediate use, or upload the graphic to an available content library to use later.
To Schedule and/or Publish Immediately
To use immediately, select Compose in the top right corner of the dashboard. Select the channels and type of post you’d prefer, and decide on a date and time to schedule the post for publishing. To upload the new graphic, select the boxed area that contains a “+” and find your downloaded graphic in the folder where you saved it. Open the graphic to include it in the post. Make any additional changes to your post here, including adding alt text or last-minute image adjustments, such as sizing or adding a logo. Finally, type a message to include as a caption. Once your post is ready, you can either save as a draft or submit the post for approval and/or publication.
Saving to a Content Library for Future Use
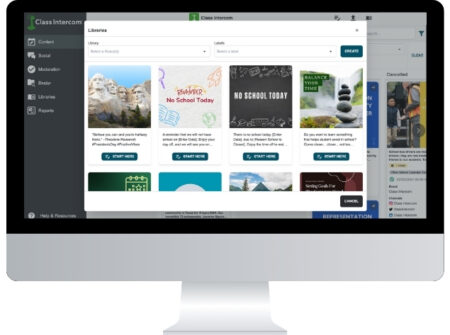
A content library is a collection of premade posts and post templates that can be resources by users with access at any time. Class Intercom includes a complimentary content library schools can use as needed. The platform also lets schools make their own libraries for internal use.

Using the content libraries, users can create pre-approved content for future use.
If you already have a pre-existing content library, select Libraries in either the top right corner of the dashboard or on the left side panel. Select Create, and choose the library to keep your new graphic in. Now you are able to set active dates for how long you’d like this post to be available for use. For example, active dates for a Christmas post might be from December 1st through December 25th, allowing your content team access to this post du
ring the optimal time period. After the set end date (e.g. the 25th in this Christmas example), the post will automatically be removed from the library. After your dates are set, select “+” to upload your Canva graphic. Find and open your graphic, and include a message as a caption to complete the post. You are now able to save your new post as a draft or publish it to your content library.


